Color Tutorial
How to Color Cups in 4 Ways
A cup may look like a simple object to color, but changing its material can completely change the way you approach the page. Wood needs visible grain, metal depends on soft reflections, glass needs transparency, while ceramic gives you more freedom to play with color and pattern.
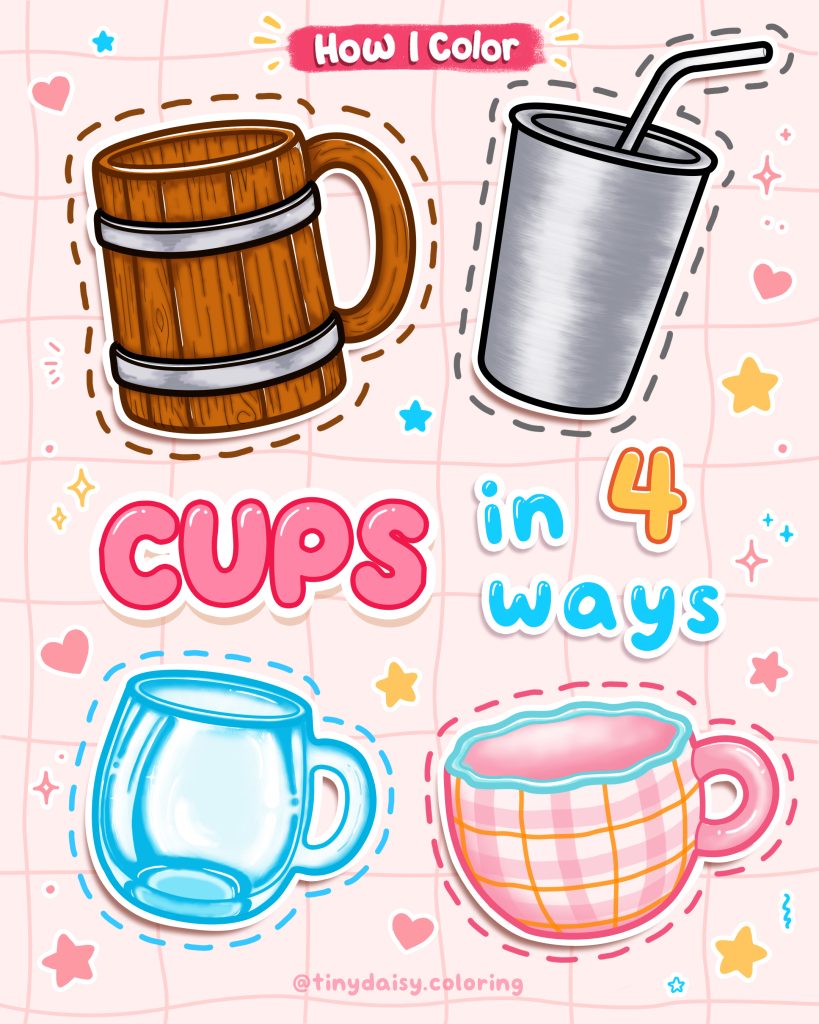
In this tutorial, we’re coloring four cups in four different ways: wooden, metal, glass, and ceramic. Each one uses a different combination of color, texture, shadow, and highlight to create its own finish.
Tools We Used
1. Alcohol Markers
- Wooden Cup: YR1, CG2, Y210, NG03
- Metal Cup: CG2, BG060, NG03
- Glass Cup: B030, PB8, PB7
- Ceramic Cup: RV260, BG4, R190, BG68, YR090
2. Other Tools
- Gel pen for wood grain details
- White pen or marker for highlights
- Cotton bud / cotton swab for blending the metal texture
Wooden Cup
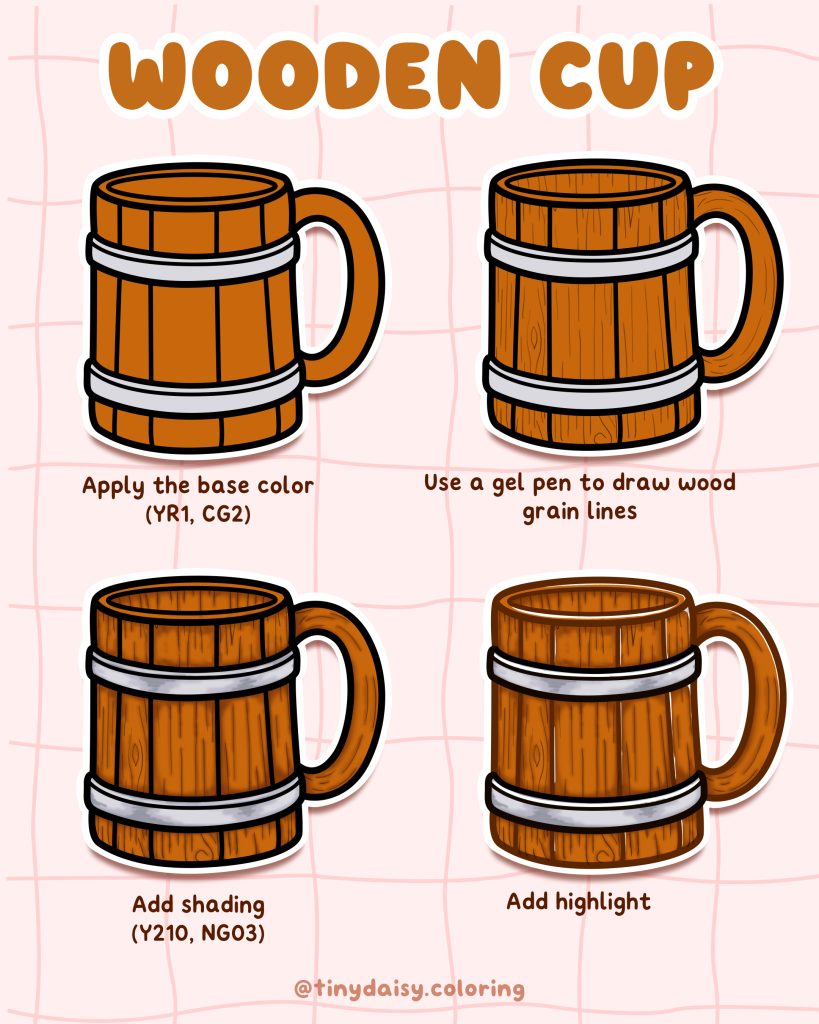
For the wooden cup, the color is only the beginning. What really gives the surface its wooden character is the grain. Small irregular lines running along the cup help break up the flat brown area and create a natural texture.
Keep the grain varied rather than perfectly even. Once the darker shading and final highlights are added, the cup gains more depth while still keeping that warm wooden look.
How to Color a Wooden Cup
- Step 1: Apply the base color using YR1 and CG2.
- Step 2: Use a gel pen to draw the wood grain lines across the wooden sections.
- Step 3: Add shading with Y210 and NG03 to create more depth.
- Step 4: Add highlights to finish the wooden texture.
Metal Cup
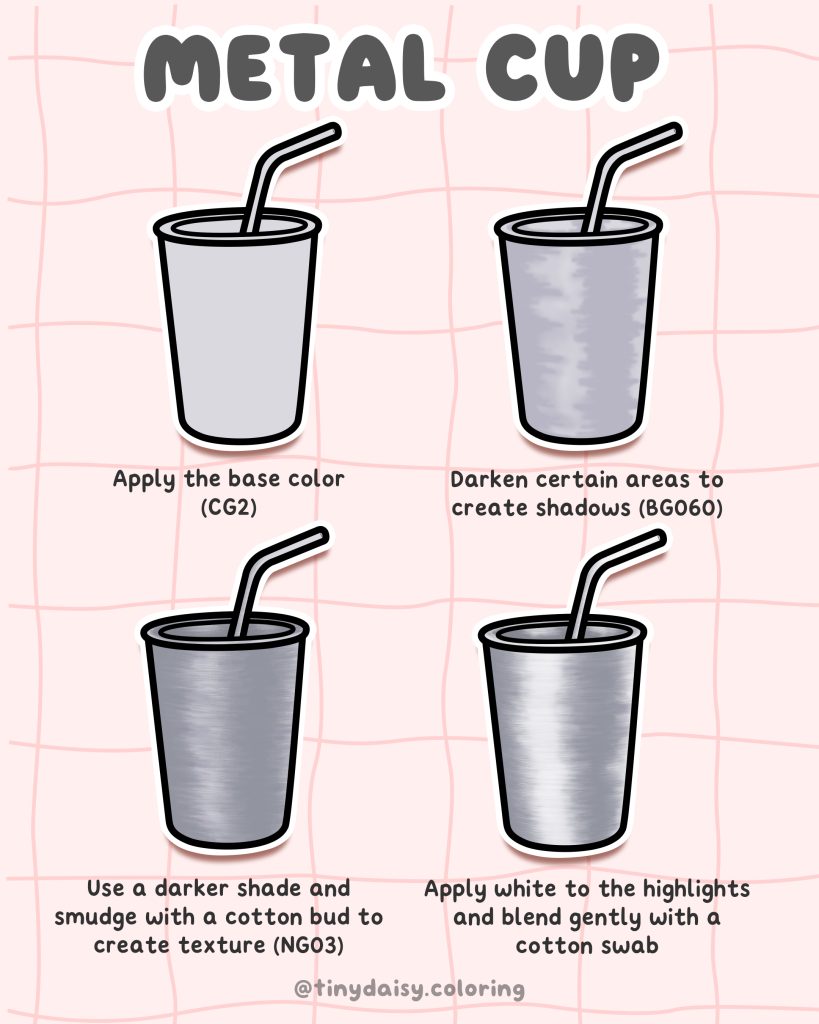
Metal looks more convincing when there is a noticeable difference between light and dark areas. Instead of coloring the entire surface in one solid gray, build soft changes in value across the cup to suggest reflected light.
Blending some of these marks with a cotton bud helps soften the transitions and gives the surface a brushed-metal appearance. A bright central highlight at the end makes the metallic effect much easier to see.
How to Color a Metal Cup
- Step 1: Apply the base color with CG2.
- Step 2: Darken selected areas with BG060 to create shadows.
- Step 3: Use NG03 for the darker texture, then gently smudge it with a cotton bud.
- Step 4: Apply white to the highlight areas and softly blend with a cotton swab.
Glass Cup
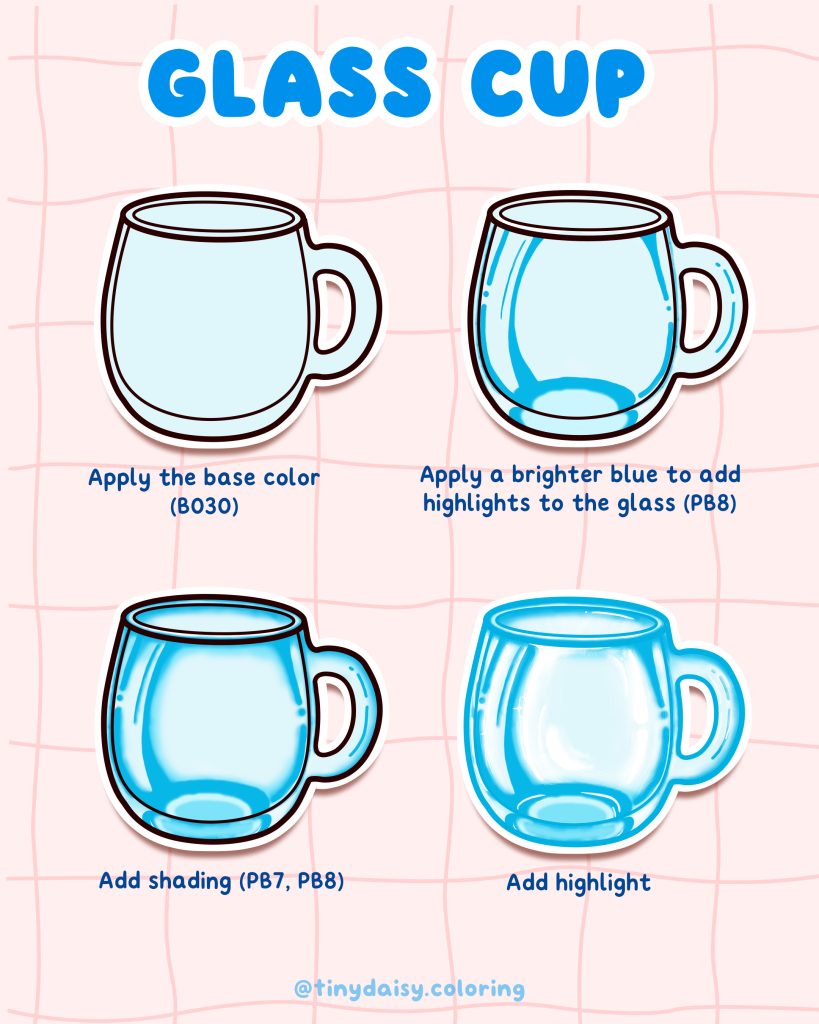
The glass cup works differently because the goal is to make the cup feel light and transparent rather than fully filled with color. Pale blue gives the glass a subtle tint, while stronger blue around the rim, sides, handle, and base defines its thickness.
Try to preserve lighter areas through the center of the cup. These open spaces, combined with stronger shadows near the edges and bright highlights, help create the illusion of transparent glass.
How to Color a Glass Cup
- Step 1: Apply the light base color using B030.
- Step 2: Use PB8 to define the brighter blue areas around the glass.
- Step 3: Add shading with PB7 and PB8, keeping the center lighter.
- Step 4: Finish with bright highlights to strengthen the transparent glass effect.
Ceramic Cup
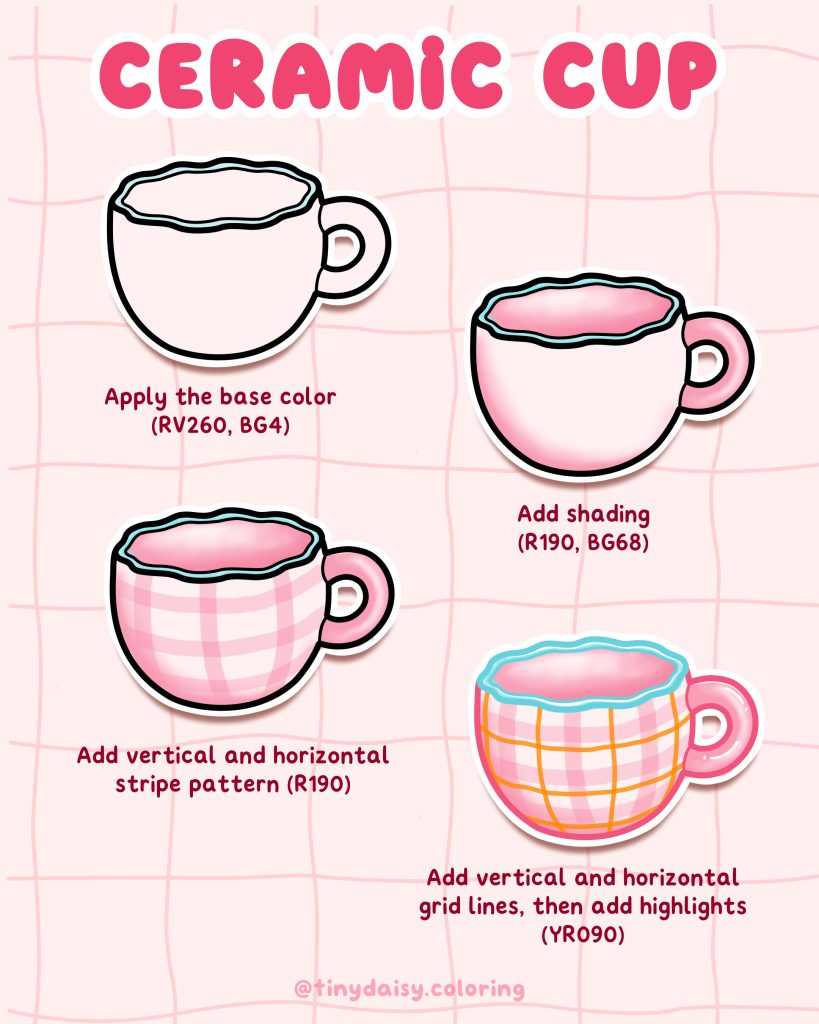
Ceramic is a fun surface for experimenting with both color and pattern. For this version, soft pink shading gives the cup its rounded form before a simple plaid-inspired pattern is layered over the surface.
The vertical and horizontal lines should follow the curve of the cup instead of appearing completely flat. A contrasting rim and a few clean highlights finish the design and give the ceramic a smooth, glossy appearance.
How to Color a Ceramic Cup
- Step 1: Apply the base colors using RV260 and BG4.
- Step 2: Add shading with R190 and BG68.
- Step 3: Use R190 to add the vertical and horizontal stripe pattern.
- Step 4: Add the grid details with YR090, then finish with highlights.
One Object, Four Different Textures
These four cups start with a simple idea, but each surface needs a different coloring approach. The wooden cup relies on grain, the metal cup uses blended light and shadow, the glass cup keeps plenty of light areas for transparency, and the ceramic cup combines smooth shading with a decorative pattern.
This is also a useful exercise for other coloring pages. When you come across everyday objects, try thinking about their material before choosing your colors. The same basic shape can feel completely different once you change its texture, reflections, and highlights.
Which one would you like to try first: wood, metal, glass, or ceramic?